Easily Add Taxi Braking Convience to ALL . . .
.
Microsoft's Flight Simulator
FS2000, FS2002 & FS2004
Home Technologies FLA - formerly
Suncoast Technologies Spring Hill FL
Completely
Assembled/Tested
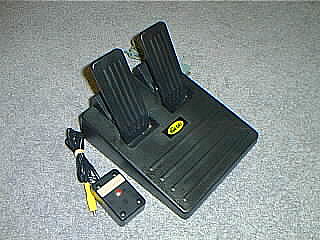
* Realistic Aircraft Braking
* With Parking Brake
REALISM!
* Inexpensive Addition to ALL MS Flight
Sims
* Use Flight Sim 'Settings' to Assign
Functions
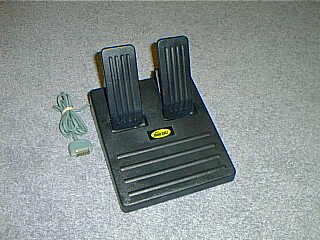
* Uses Standard Grameport Connection or
*
Gameport to USB Adapter
* Uses Standard 15 Pin Male
Connector
* NO Outside Power Required
* Easy
Programming Instructions
* Operates Using X & Y
Axis
* MODEL # POT001

Installing the Brake
Pedals on Your Gameport
The Braking Pedals will operate with Win95,
Win98 & XP systems. Just plug the Brake Cable into the GamePort
Connector. The XP computer will sense the new hardware and load the
appropriate software. If not, you might have to install it
yourself.
First, locate the 'START' icon in the lower left hand
corner of the XP computer screen  and CLICK on it. Then CLICK on 'CONTROL PANEL';
then 'GAME CONTROLLERS'.
and CLICK on it. Then CLICK on 'CONTROL PANEL';
then 'GAME CONTROLLERS'.

THEN CLICK 'CONTROL
PANEL'
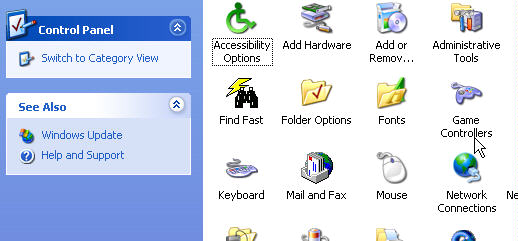
THEN CLICK 'GAME
CONTROLLERS'
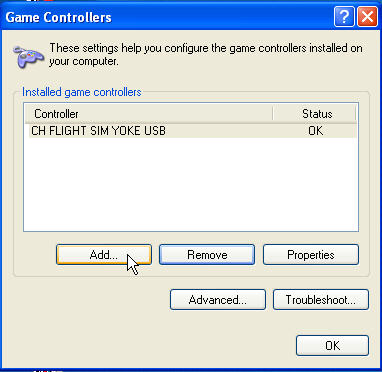
With the 'GAME
CONTROLLERS' window showing; click on 'ADD'. Then Highlight '2-axis,
2-button joystick'. Then Click 'OK'. With the Brake Pedals connected to
the Gameport; the Game Controllers window will display under 'STATUS'
the word 'OK', indicating that the driver is installed and the Brake
Pedal is recognized.
THEN CLICK 'ADD'
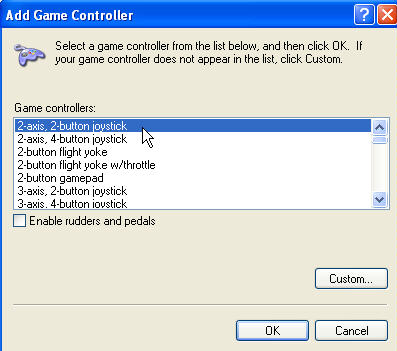
THEN HIGHLIGHT '2-AXIS, 2-BUTTON
JOYSTICK - THEN 'OK'
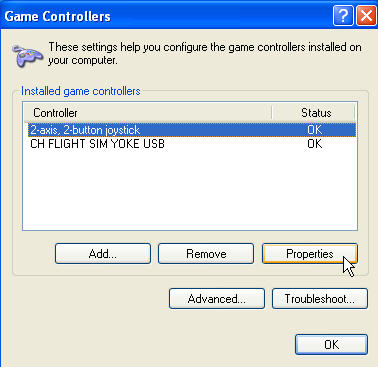
BRAKE PEDDLES SENSED - STATUS -
OK. THEN CLICK 'PROPERTIES'
Next, we need to Calibrate the
Brake Pedals by Clicking on 'Settings'.
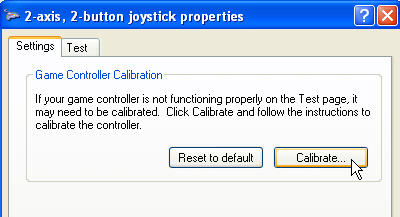
Then Click on
'Calibrate'.
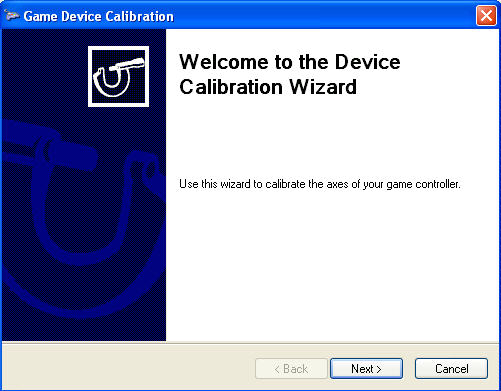
The 'Game Device Calibration'
Window will Appear.
Then Click 'NEXT'.
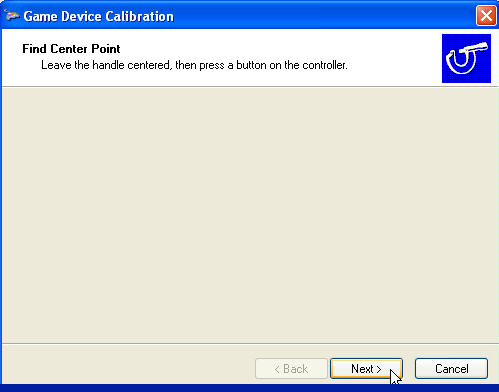
Now come the Tricky Part.
With the Brake Pedals on you lap; take your hand and
press BOTH Pedals HALF WAY down. Say on a scale from 1 to 10; 1 being
the Pedals at rest and 10 being the FULL deflection (pressing the
peddles as far as they will go); Press the Pedals to 5 (Half
way).
Then Click 'Next'.
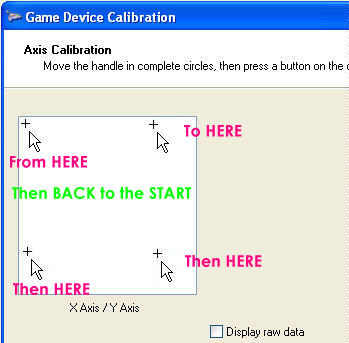
The '+' icon should be in the Upper LEFT Hand
Corner of the Calibration Window. Now, press the LEFT Pedal HALF WAY.
The '+' should move to the Upper RIGHT (but NOT all the way).
With pressure still on the LEFT Pedal; press the RIGHT Pedal
(Half Way). The '+' will now move from the Upper Right hand corner to
the Lower Right Hand Corner (but NOT all the way). With pressure still
on the RIGHT Pedal, Release pressure from the LEFT Pedal. The '+' will
not move from the Lower Right corner to the Lower LEFT Corner. Now,
release pressure from the RIGHT Pedal. The '+' will now move from the
LOWER LEFT Corner to the Starting Point; The Uper Left.
What we
need to do is to MOVE the '+' icon all around the Calibration Window;
Right, Down, Left then Up. Do this procedure a few more
times.
Then Click 'Next'.
When Clicked; Another
Calibration Window Appears, asking you to Center the Joystick then Click
'Next'. Do this by Pressing BOTH Pedals HALF WAY in as before (Remember
#5 on the 1 to 10 Scale?). Then Click 'Next'.
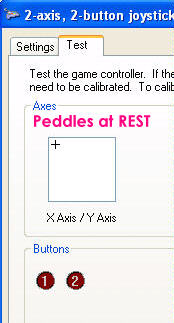

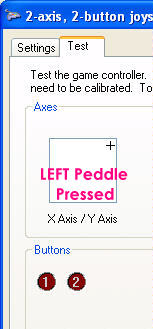
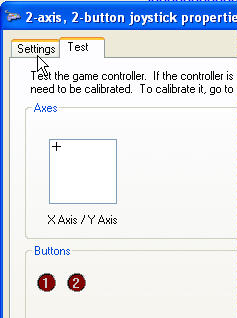
The 'TEST' Window will now appear. Note
that the '+' icon is in the UPPER LEFT HAND CORNER of the window. This
is where we want it to be. Press the Left Brake Pedal; the '+' icon will
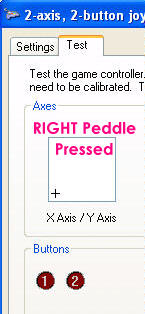
move FULLY to the RIGHT; Then Release. Press the Right Pedal; the '+'
icon will now move from the Upper Left hand corner to the LOWER LEFT
Corner.
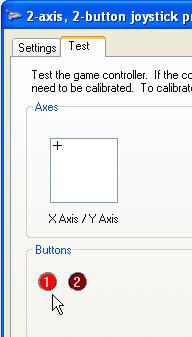
Finally, with the Parking Brake plugged into
the RCA jack on the Back of the Brake Pedals; Press the spring return
button. The #1 RED Circle will LIGHT, indicating all is fine.
If your Pedals do not perform as indicated; go
back and Re-Calibrate the Pedals again.
Installing the Brake
Pedals on Your Flight Simulator
Now that the Brake Pedals are Calibrated, we now
must Install them on our Flight Simulator. I will show you how to
install the Pedals using FS2002. Similar procedures can be used with
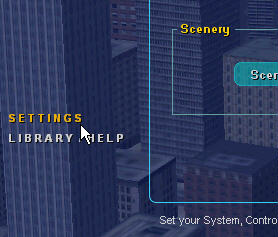
FS2000 & FS2004. Start-up your version of 'Flight Simulator'. Find
and Click the 'Settings' Icon. Then Click 'Assignments'.
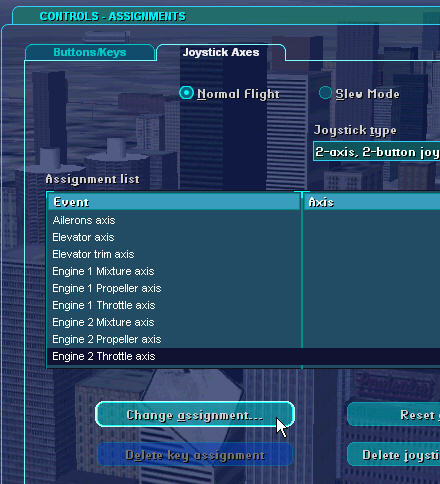
Click 'Joystick Axis'; then Highlight '2-axis
2-button joystick' under 'Joystick Type'. Delete any Default settings
that the FS program has created.
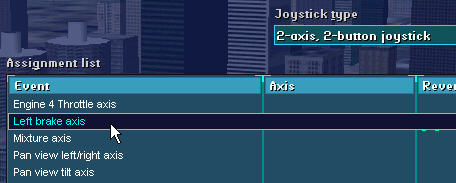
Now Highlight 'LEFT BRAKE AXIS'; then 'Change
Assignments'.
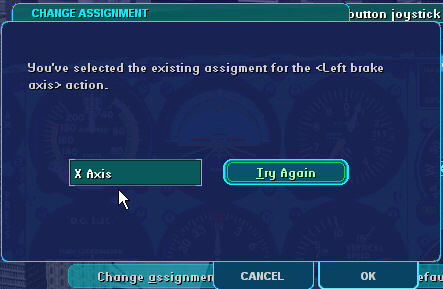
With the 'Change Assignments' Window showing;
Press the LEFT Brake Pedal. 'X-AXIS' will appear in the small window.
Then Click OK.
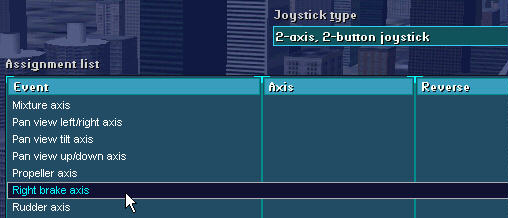
Now Highlight 'RIGHT BRAKE AXIS'; then 'Change
Assignments'.

With the 'Change Assignments' Window showing;
Press the RIGHT Brake Pedal. 'Y-AXIS' will appear in the small window.
Then Click OK.

Note in the above Photo, the small boxes to
the right of Left Brake Axis and Right Brake Axis. Using your mouse,
Click on each box. An 'X' will appear. Do this for BOTH Brake Axis. Your
Assignment List should look like this (see above).
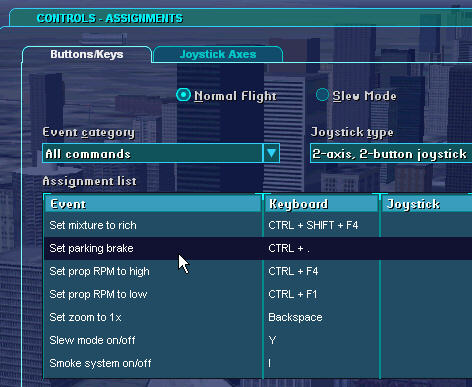
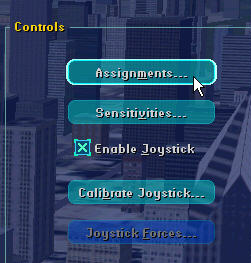
With the Brake Pedals now Calibrated and
Assigned; Lets turn our attention to Assigning the 'Parking Brake'
switch. While still under the heading '2-axis 2-button' (Joystick Type),
Click on 'Buttons/Keys'. As before, Delete any Default settings the
Flight Simulator assigned. Find 'Set Parking Brake' in the list and
Highlight it. And Click 'Change Key Asignments'.
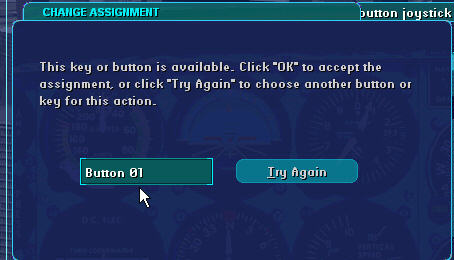
With the window displayed as shown above,
Press the 'Parking Brake' Button. Button01 will appear in the small
window. Press OK.
THIS COMPLETES THE
INSTALLATION

HAPPY FLYING!
Braking Pedals
Microsoft Flight Simulator FS2000, FS2002,
FS2004
Will work with
ALL Aircraft Configurations
(from the Piper Cub to the
Boeing 777 & MORE!)
Support@DesktopAviator.com