|
Using Jumper Wires to Fix the open Traces on the Model 2030 Digital Switch Board |
|
The Problem!
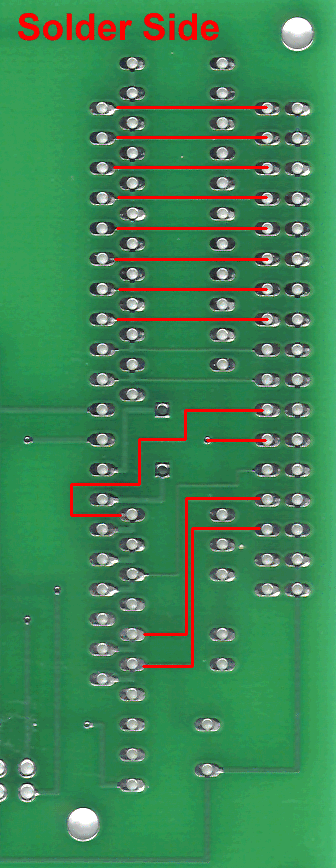
This is what happened to the board. As you can see from the photo below, there are 12 broken copper traces leading from the chip to the 17x2 header connector. These breaks were so small that my PC Board layout program failed to show them on the monitor or show them up when I printed out a 1:2 hard copy of the layout. So I thought all was well until the circuit board were delivered, assembled and tested. The breaks are very small but with a little soldering skills and a bit of patience, you can solder a small jumper wire between the chip and the header connector.
Below is a close-up of the solder side of the board. The 12 RED lines indicate where the copper traces need to be jumped by a very small gauge solid or stranded wire. With these repaired in-place, you will now have a 2230 board with 31 available inputs for your SPST toggle switches. Seeing that the 2230 and the 2120 board set-up are the same (conecting the switches to the J1 and J2 connectors; you can goto: http://desktopaviator3.tripod.com/Instructions/Model_2120/index.htm J1 (on the left side of the board), controls Switch #1 to Switch #15. The last two rows on the J1 connector are not used. Switches #16 to #31 are controller by J2. Note that the last row of connectors on J2 is not used. Once we have corrected the problems with the board, I will be posting a more complete webpage on the Installation of the 2230 board. Bobby B.
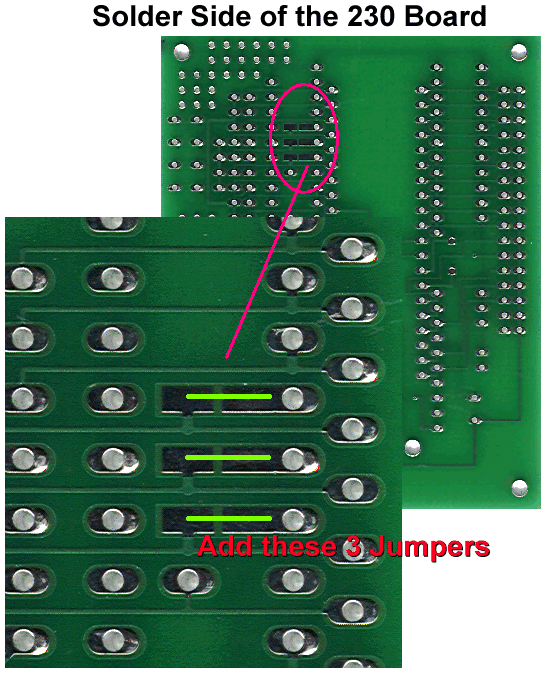
Additional Wiring 6-11-2011 Looking at the solder side of the 2230 board, you will find 6 rectangular copper traces in groups of 3. Notice the very small separation between each of the horizontal pair. You need to take a small piece of wire and SHORT these two adjacent rectangular copper pads. 3 Jumper wires are needed.
|