Thank you for your purchase of our Model 2100B Cessna
Avionics Panel with Magneto Test Feature. Before use, the Panel must be
programmed with switch assignments using a licensed version of FSUIPC.
The Switch Assignments are involved but can be easily assigned with
the help of the following information.
These Instructions can also be used to program the Model
2100 and Model 910 Avionics Panels.
If you have any
comments or need additional information on the use of the 1010B Avionics
Panel,
please write us
at:
INSTALLATION
Installing the 2100B Panel requires
very little time. All you need is an unused USB Port. These additional
Ports can be added to your computer by using a device called a USB Hub.
These Hubs can be purchased for as little as $20.00 in the
Internet.
Just plus the USB Cables from
the back of the 2100B Panel into the Hub Adapter and let your computer
locate and load the required software for its proper operation. The Radio
will be sensed as "Avionics Panel 2100-B". That's all there is to the
installation.
Programming the
Buttons and Switches
As mentioned earlier, the 2100B does
require the licensed version of FSUIPC. This small .dll program resided
inside the Module File of your FS2002, FS2004 or FS X Flight
Simulator. FSUIPC come is two versions. The FSUIPC 3.75 used for FS98,
FS2000, FS2002 and FS2004. While Version FSUIPC4 is used strictly for the
New FS X Flight Simulator.
Either one of these programs can be
Downloaded Free of charge from:
The Code Key for either program can
be purchased from simMarket (A link to simMarket is also provided at the
FSUIPC site). The code Key costs about $24.00.
When you download the required FSUIPC
program; copy the .dll program to Flight Simulator's "Module"
File. That's it. Now it's time to load and run your Flight Simulator
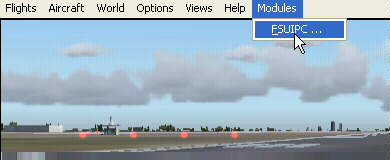
Program. When running, click on "Create a Flight". When you have a your
Cessna 172 or anyother aircraft on the Runway, press the "ALT" key. On the
TOP of the screen a thin white band of extra options will appear. Click on
"Modules"; then "FSUIPC".
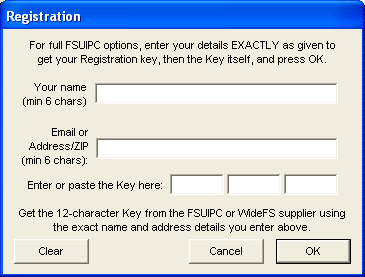
Using FSUIPC for the first time, you
are asked to input your Name, Email Address and the Code Key you just
purchased. When entered correctly, FSUIPC is ready to be programmed for
use with your NAV/COM Radio (Note: After inputting your Code Key, you need
to Restart Flight Simulator so that the Code Key can take
effect.
After reloading your Flight
Simulator program; it's time to Program your Avionics
Panel.
Programming the 2100B
Switches
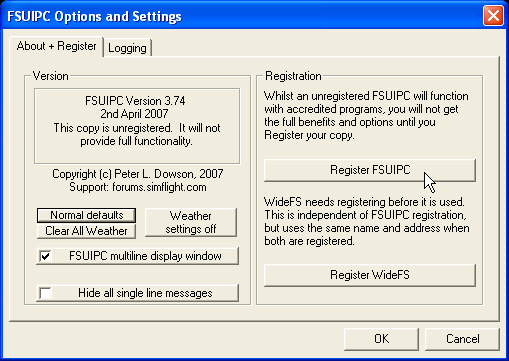
With your
copy of FSUIPC Registered; now is the time to program the Radio Panel.
Again, with FS running, hit the "ALT" Key. With the White Band appreaing
in the top of the monitor; click "Modules" then "FSUIPC". With the main
FSUIPC window showing, locate and click on "Buttons +
Switches".
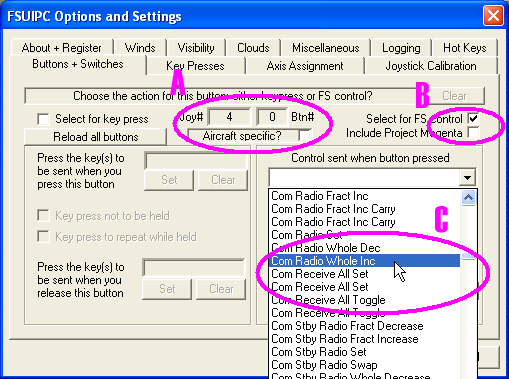
You will
get the window appearing above.
There are three main
sections of this window that require our attention. They are indicated by
the letters "A", "B" and "C". Section "A" shows the Button or Switch that
you press and it's USB Port Location. By pressing other buttons on the
Radio Panel, these settings will change accordingly. "B" needs to be
click. The "Check" Mark needs to remain with ALL Programming. This Check
Mark allows you to choose your button assignments from the FSUIPC listing.
"C" shows all the assignments available that your 2100B Panel can be
programmed to.
Now using the TABLE
below, we will program each 2100B Switch and Push Button to the needed
functions. Table 1 shows the suggested setting of each of the 2100B's
switches. These are only suggestions, over time you will be familiar with
the FSUIPC settings and you will gain more confidence in programming the
2100B switches for your ouw needs.
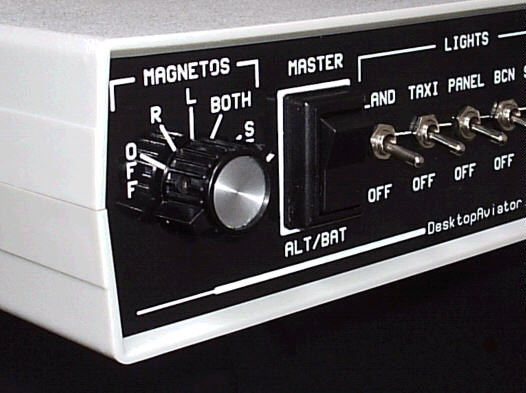
Below is a photo of the
front panel of the 2100B's front Panel. Each Push Button, Toggle and
Rotary Switch is shown by a number. This number (in conjunction with
the information in the Settings Table) will show you the which button
would need to be "Flipped" or "Turned"
 Model 2100B's Button
Assignments for use with FSUIPC
Model 2100B's Button
Assignments for use with FSUIPC
With the Rotary Switch in its
"Magnetos Right" Position; start your version of
Flight Simulator. Open the FSUIPC software as described above and proceed
with the following TABLE.
Table below can also be
used for programming the Model 2100 & Model 910
Panels.
|
Panel
Switch |
Switch
Action |
FSUIPC
Assignment |
| Rot Switch |
Rot Switch to
"OFF" |
MAGNETO OFF |
| Rot Switch |
* Rot
Switch to "R" |
MANGETO RIGHT |
| Rot Switch |
* Rot
Switch to "L" |
MAGNETO LEFT |
| Rot Switch |
* Rot
Switch to "BOTH" |
MAGNETO BOTH |
| Rot Switch |
Rot Switch to "START" |
MAGNETO START (
* CHECK - Control to REPEAT ) |
| Rocker SW #2 |
ALT/BAT On/Off |
TOGGLE MASTER BATTERY
ALTERNATOR |
| Toggle Sw #3 |
Landing Lights |
LANDING LIGHTS TOGGLE |
| Toggle Sw #4 |
Taxi Lights |
TOGGLE TAXI LIGHTS |
| Toggle Sw #5 |
Panel Lights |
PANEL LIGHTS TOGGLE |
| Toggle Sw #6 |
Beacon Light |
TOGGLE BEACON LIGHTS |
| Toggle Sw #7 |
Strobe Lights |
STROBES TOGGLE |
| Toggle Sw #8 |
Flip Pitot Heat Sw |
PITOT HEAT TOGGLE |
| Rocker Sw #9 |
Flip Avionics Master Sw |
TOGGLE AVIONICS
MASTER |
* NOTE: Rotary Switch
Positions "R", "L" & "BOTH" NOT Available with the Model 2100 and
Model 910
To keep the switches in sync with
the avionics panel seen on the screen, place the Rotary Ignition Switch to
its "BOTH" position; MASTER ALT/BAT switch to "On"; MASTER AVIONICS
switch to "On" and all remaining toggle switches to "Off"; before running
Flight Simulator program.
HAPPY
FLYING!
Purchasing Information can be
found HERE;
|