|
|
|
INSTALLATION INSTRUCTIONS for the Model 2030 USB Elevator Trim Wheel |
| ||
|
|
|
|
| ||
|
|
|
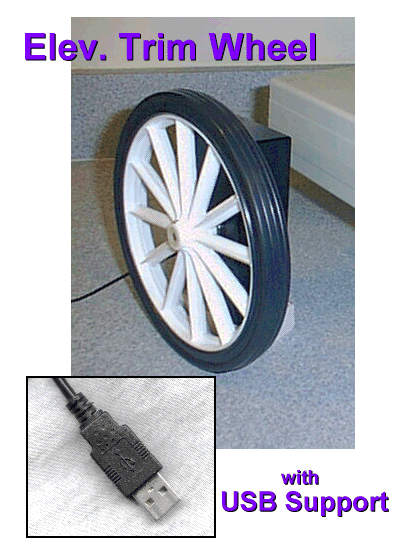
Thank you for your purchase of our USB Elevator Trim Wheel. Just find an unused USB Port on your computer and insert the Trim Wheel. That's ALL There is to the Installation. Calibration is a bit more complicated but this is also an Easy Task. Just following the Instructions below; within 5 minutes, you will be flying high and level with your new Elevator Trim Wheel.
The 2030 incorporates a 10 Bit Resolution USB Adapter Module, thus allowing you MORE precise control over your aircraft's Nose Up and Nose Down Attitude.
Below, you will find the detailed instructions for Calibration and Programming of your New USB Elevator Trim Wheel. Proper calibration of the your Trim Wheel is essential for the proper operation and added realism of flying YOUR Cessna. So read these instructions carefully and you will have Years of Exciting Flight Simulations.
Model #2030
Calibrating the Trim Wheel Just follow the easy instructions located below each photograph.
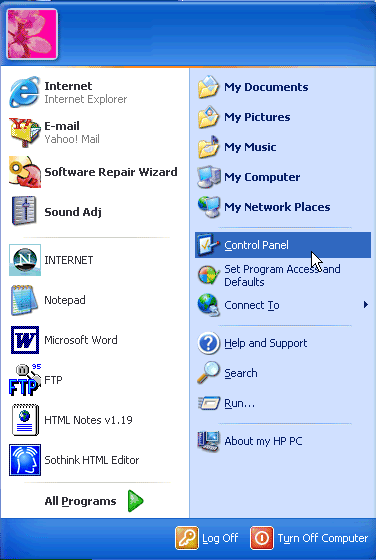
With your XP Computer running; Click on the 'START' Icon; 'Control Panel', then...
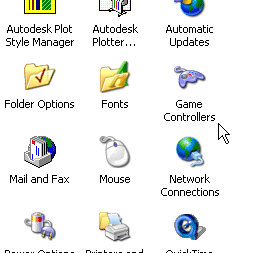
... "Game Controllers"
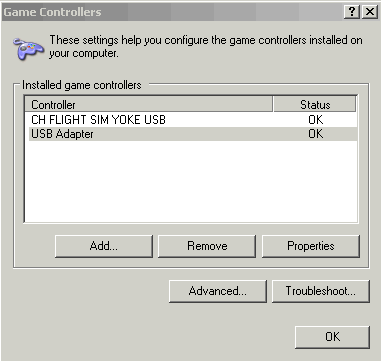
With your Trim Wheel connected to the USB Port, your Computer will sense the device as
"USB
Adapter".
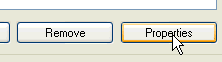
Click on 'Properties'.
After pressing "Properities", you will see the window illustrated above.
We will calibrate your Trim Wheel as follows:
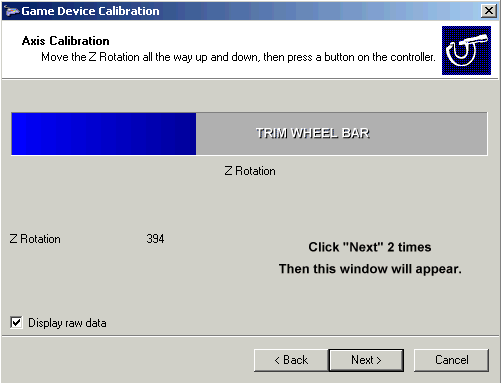
Z Rotation will be used for the Elevator Trim Wheel
RED Button #1 RED Button #2 RED Button #3 RED Button #4
Are not used at this time
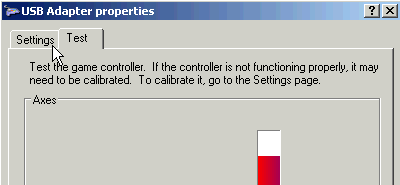
CALIBRATING THE Trim Wheel CONTROL
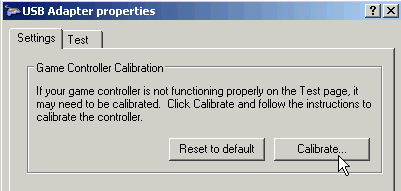
At the TOP of the "Properities" window; Click "Settings"
With the "Settings" Window showing; Click "Calibrate"
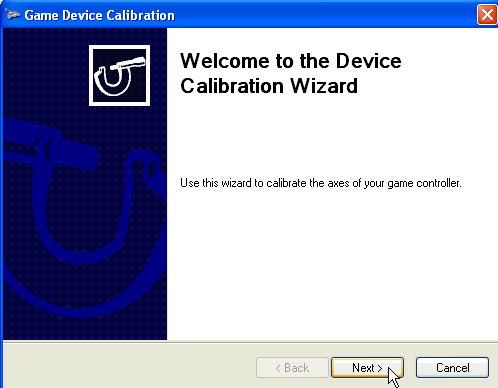
The Calibration Wizard will then be Displayed. Click on the "Next" Icon 2 Times
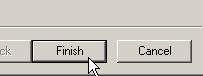
When Calibration in complete, click on the "Finish" Icon to save your settings.
First; make sure the Trim Wheel's USB Connector to an unused USB Port. And that all Optional equipment is also installed. 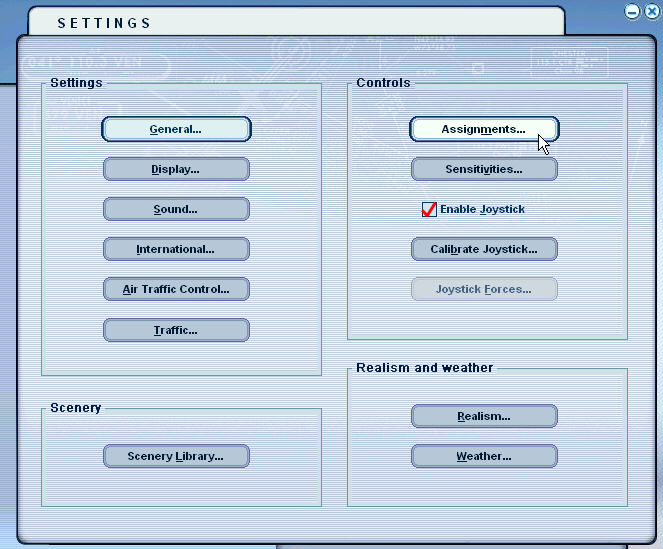
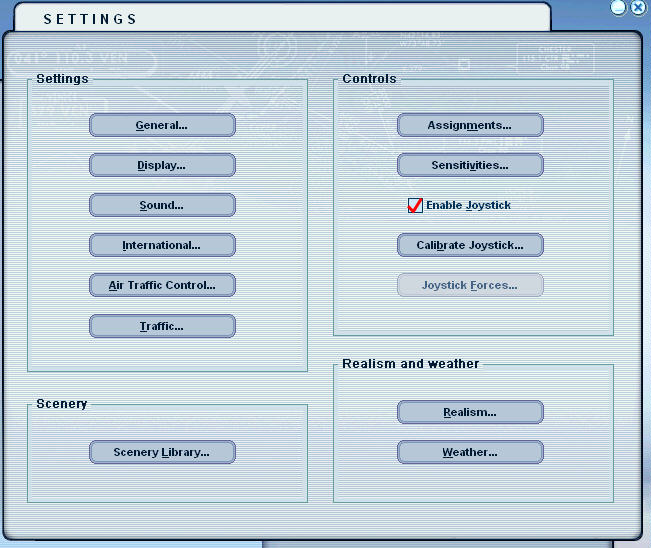
When Flight Simulator is RUNNING, Click on "SETTINGS" then "Assignments"
Programming the Elevator Trim Wheel
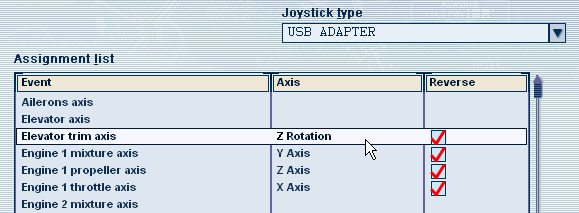
Now is the time to program the Trim Wheel into your FS2002 or FS2004 Flight Simulator. Below is the Assignment Window of the FS2004. To program the Trim Wheel, just highlight "Elevator Trim Axis"; then click "Change Assignment". As seen below, a secondary window will appear. To assign the trim wheel just move the wheel either UP or DOWN. The text "Z Rotation" will appear. Notice that you also need to Click on "Reverse". Then Click OK.
ADDITIONAL INFO: 4/16/2008 - When programming your USB Trim Wheel you need to delete any Default settings that your Flight Sim might add. To do this; with FS running, click "Settings" then "Assignments". Under "Buttons/Keys", scroll down (under USB Adapter) and delete ALL Button Assignments. These are not used with the Trim Wheel and might cause problems with other Panel Assignemtns.
Programming the Sensitivity of the Panel
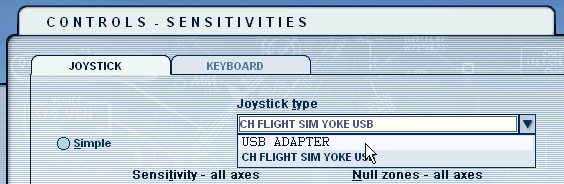
Back to the now famous "Settings Window", Click on "Sensitivities"
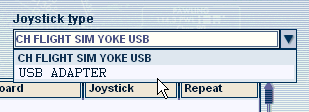
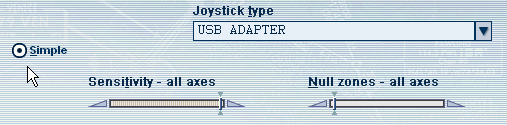
Then find and Click on under Joystick Type, "USB Adapter"
Click on "Simple". Notice the 2 Blue Bars. The left most saying "All axes". The right saying "All null zones". Take note of the placement of both bars. "All axes" MUST be all the way to the RIGHT, while the "All null zones" is places all the way to the LEFT. THIS IS IMPORTANT. If these Bars are not set correctly, the Flight Simulator will NOT provide FULL Lever deflection. This completes the Calibration and Programming of the Trim Wheel
|
| ||
|
|
|
|
| ||